FACTS Online security model, it all runs in the family
This time we dive a bit dipper into FACTS Online security model. Why this important? Because it's in our blood. We are doing this since 2003, and we take data security seriously. So let's begin with a bit of background
Family and business groups
FACTS Online security model is base on family and business groups. We believe that if we limit document sharing to a known network of people, users will have less of a chance of making mistakes. For example: If one wants to share a document with John and Jane Smith, the system will protect you from selecting the "wrong" John Smith.
The same concept goes to business owners and directors as well as trusts and other entities who may have business with you.
How to build a family group
Family groups are built through the client profile page within the client area. You can select any client within a family or even add the first one and expend from there.
Step 1: Add a client
- Login to FACTS Online
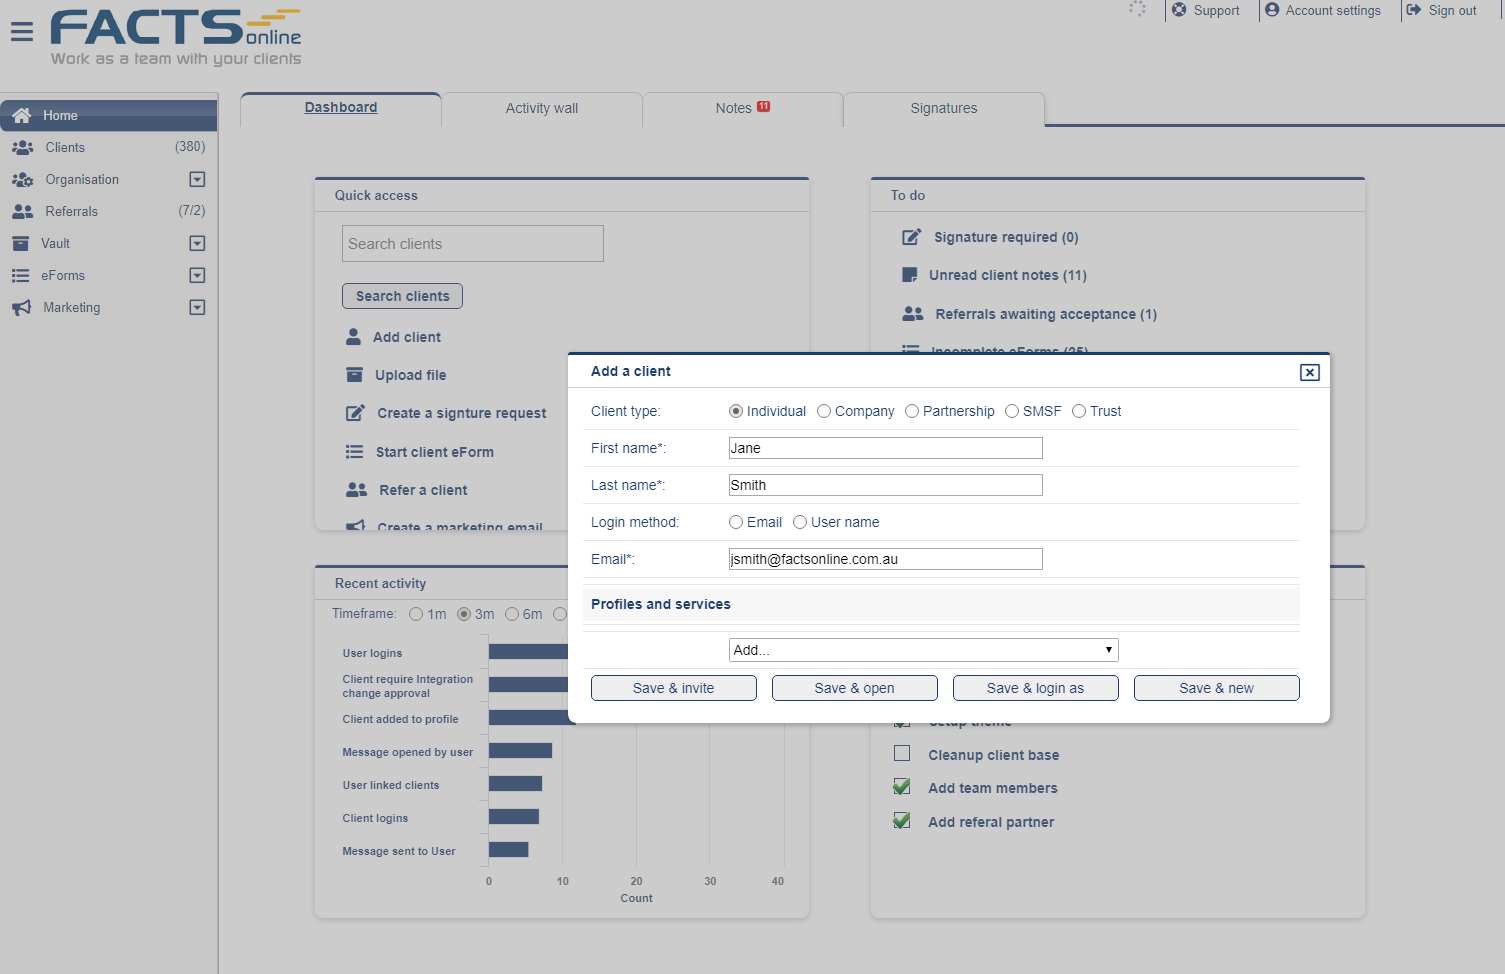
- Click "Add Client"
- Enter First name "Jane" and last name "Smith".
- Once you did. Click "Save & Open"
Step 2: Build a family tree
- From the client details page. Click "Client profile" at the left bar (mobile users, might have to open the top menu)
- At this point, you will see Jane as a solo individual
- Click "Add new", and enter John details. Set him as a spouse
- Click "Save and Link". You just created your first family network
- You can keep adding family member such as children siblings etc.
Step 3: Add a business
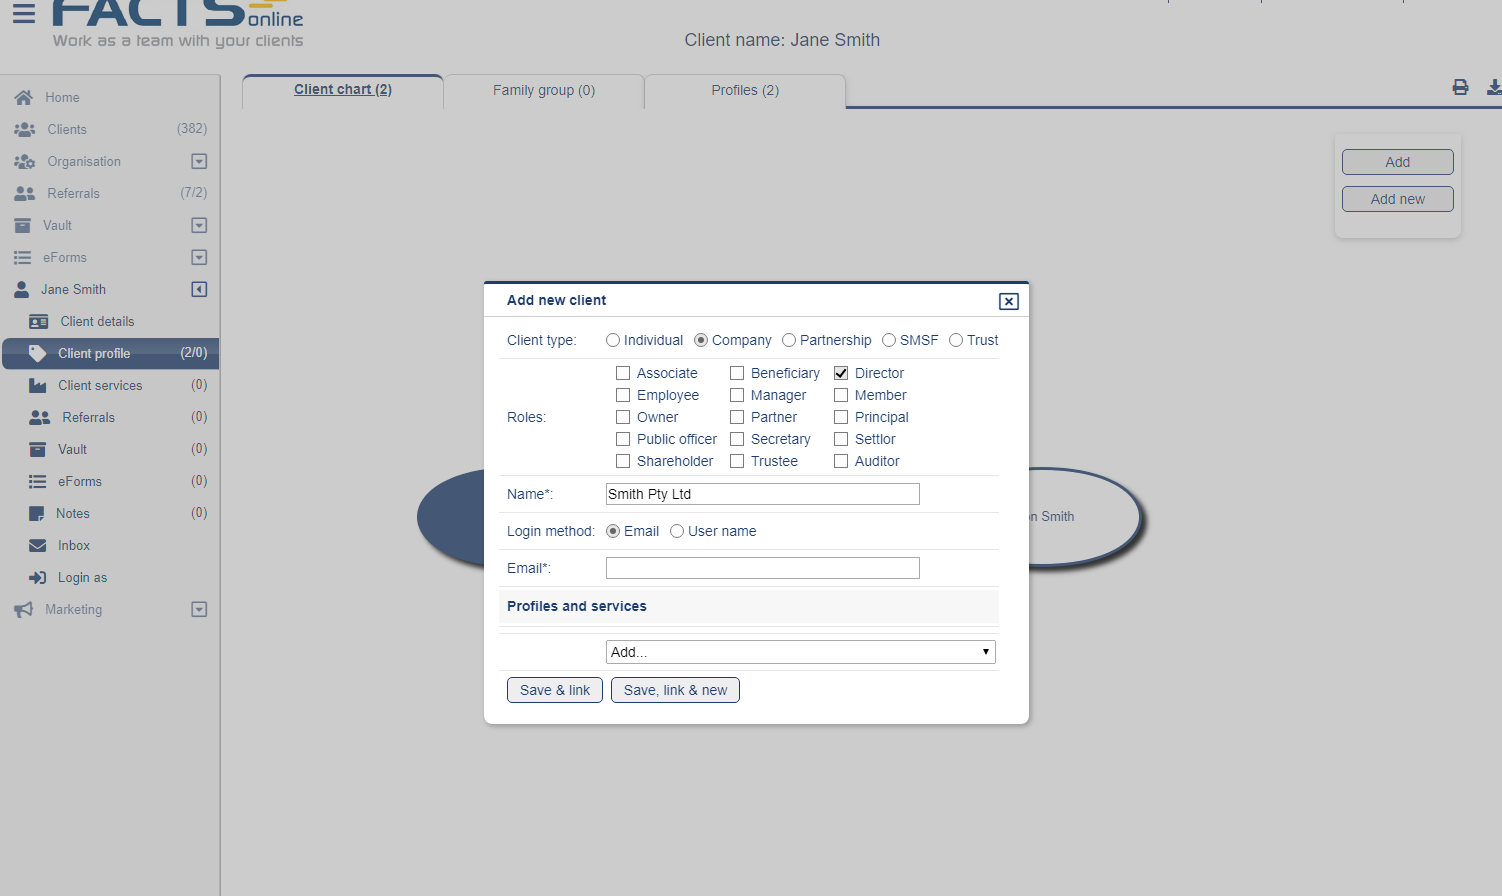
- Click "Add new" again
- This time select "Company" at the top and select the role of Jane
- Enter "Smith Pty Ltd"
- Click "Save and Link" Again.
- Click "Smith Pty Ltd" box.
- Click "Add Link" and select John.
- Close the window and review the map.
Note, In case you sync or loaded your client base. All your clients will already be in the system. Which means you will need to click "Add" and search the client base.
Share file across a family.
Step 1: Load a file to the company
- If you are within the family map, click the company box and click "Goto Client"
Or, from the dashboard, search for "Smith" and select "Smith Pty Ltd."
- At the company client area select "Vault" at the left bar.
- Upload a file by clicking the upload icon or drag and drop from your computer.
- The upload setup window will appear
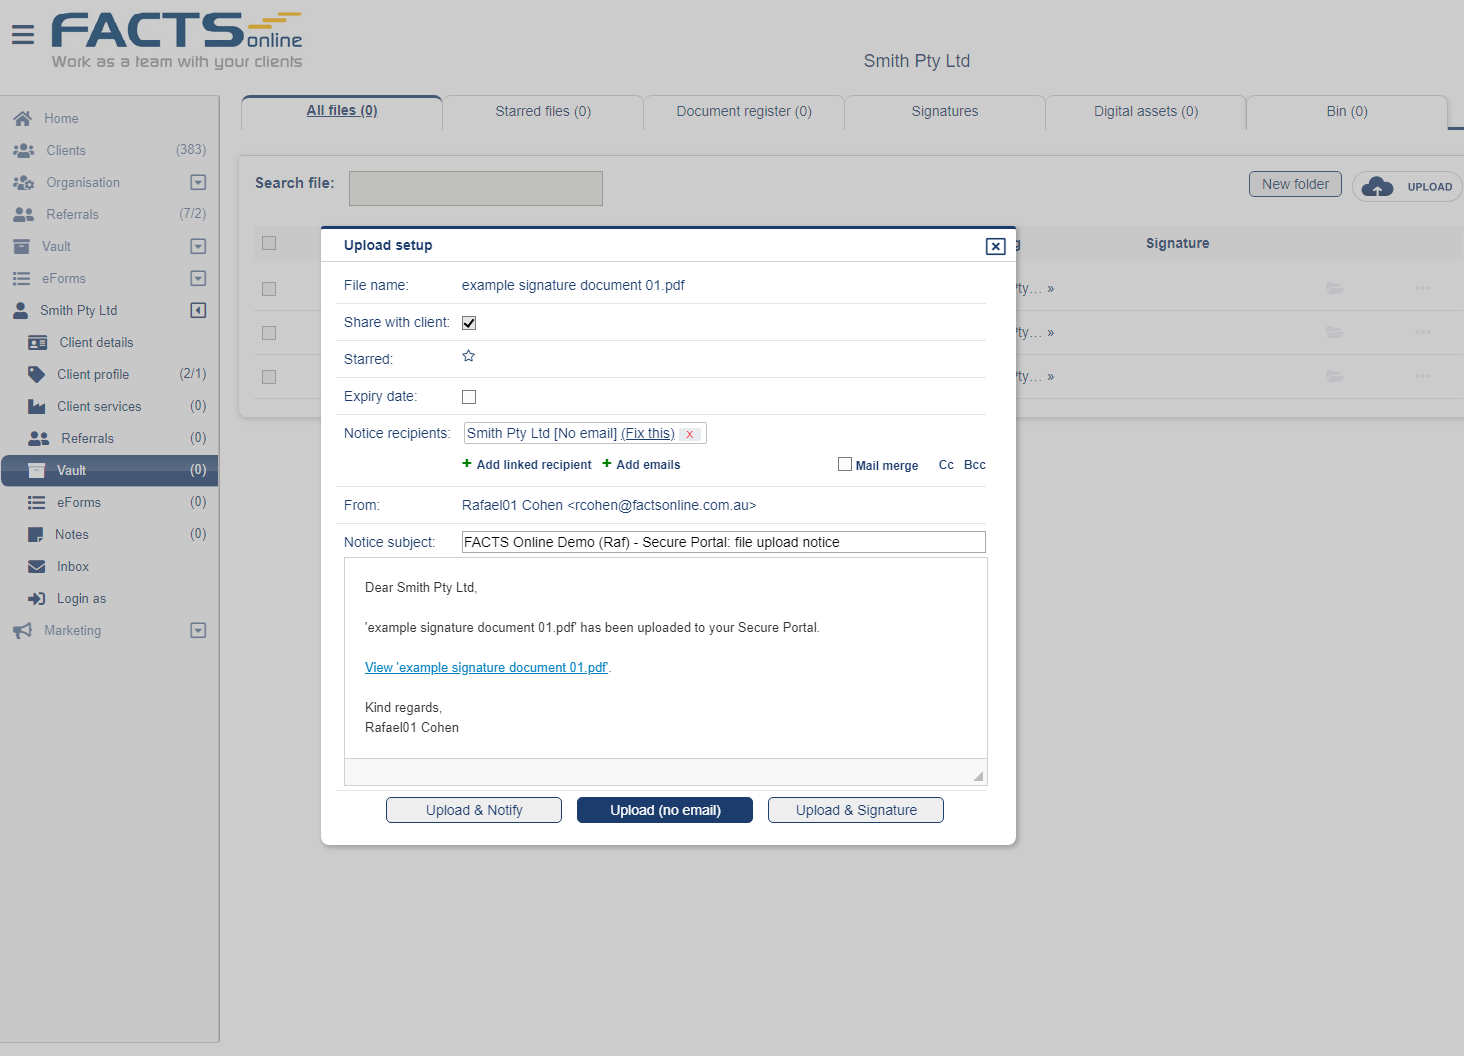
- You may create sharing from the upload page by clicking "Add linked recipients" however this is a shortcut for sharing, and this time we will use the longer structureed way.
- Click "upload (no email)" to continue the upload.
- Once upload completes, the file will appear at the company Vault.
Step 2: Share a file to linked clients
- The sharing column shows the file shared with the company client, click the sharing column of the file
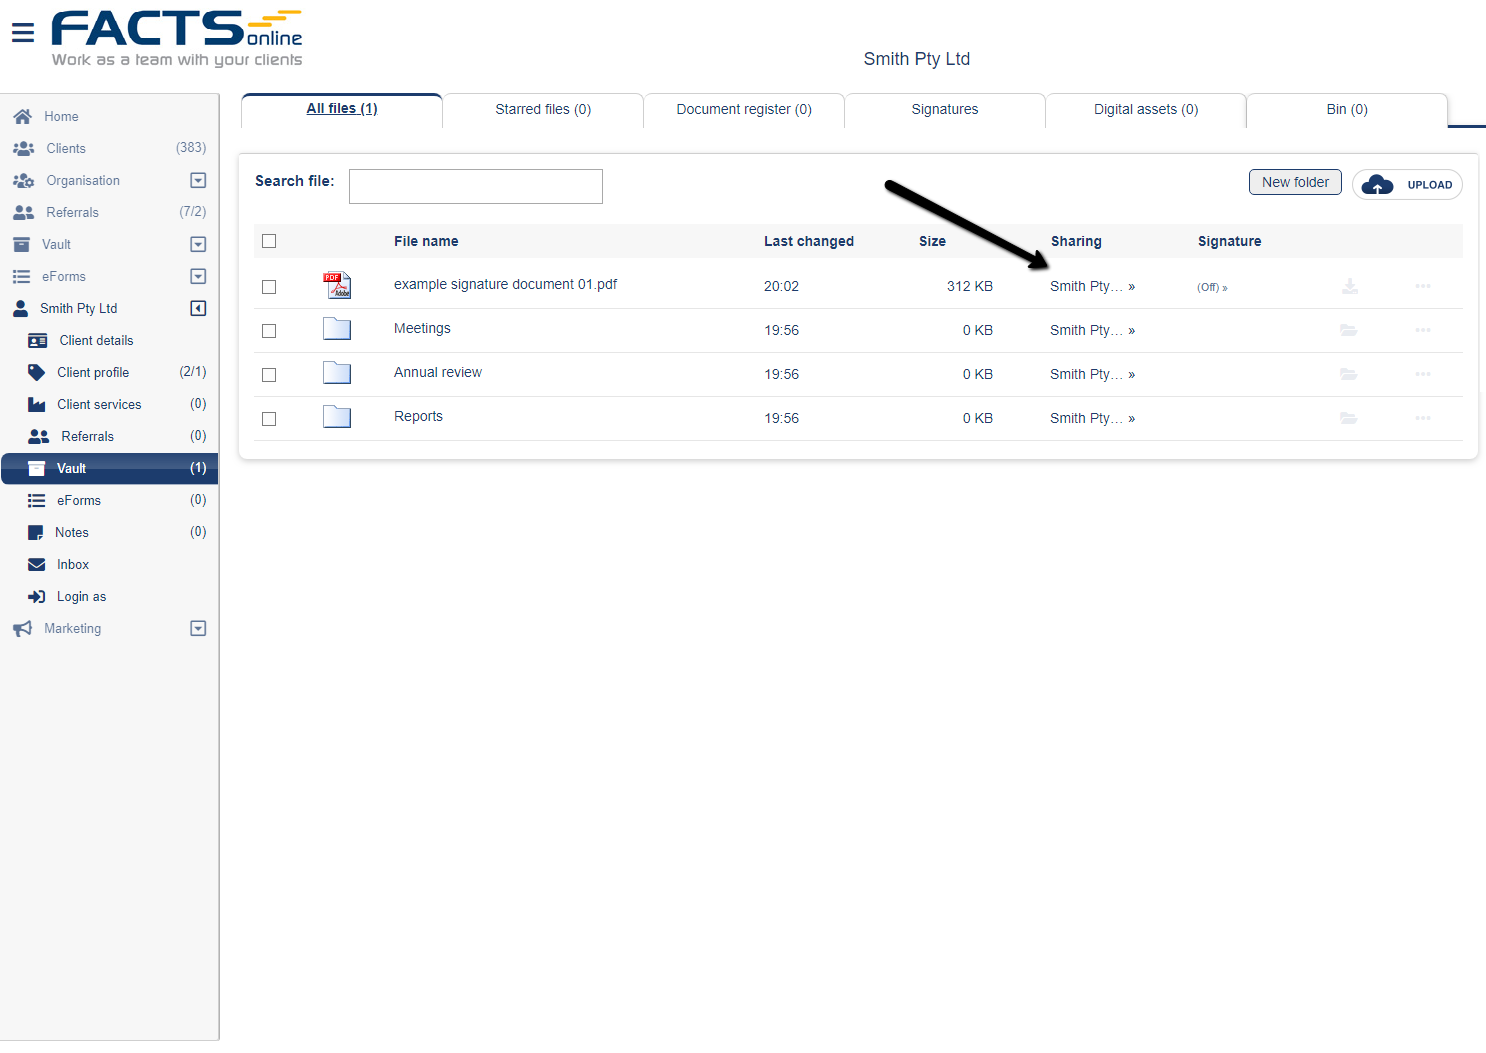
- Sharing window will open where you can add Jane and John to the document.
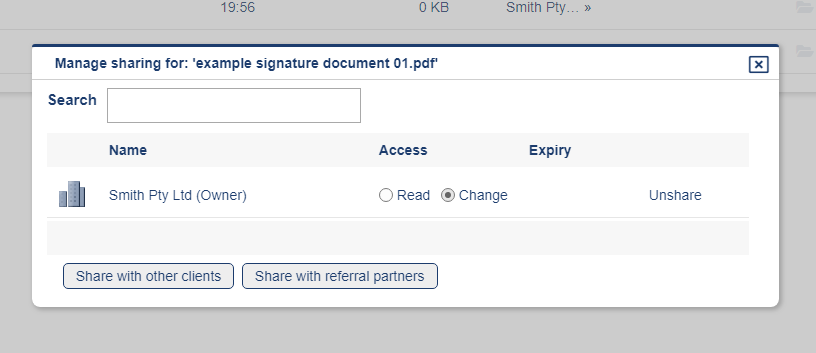
- Click "Sharing with other clients" and follow the promots to file sharing.
- Once done the document will be shared with Jane and John and will be visible as they log in to the portal
Request a signature from John and Jane
Documents with multiple signatures are common across many industries. It might be a contract between 2 or 3 parties or a deliverable that required authorisation. FACTS Online facilitate any of those scenarios as part of our digital signature module.
How to request signature
- Navigate to the document uploaded into Smith Ptl Ltd
- Click the signature column (now at "(off)" status)
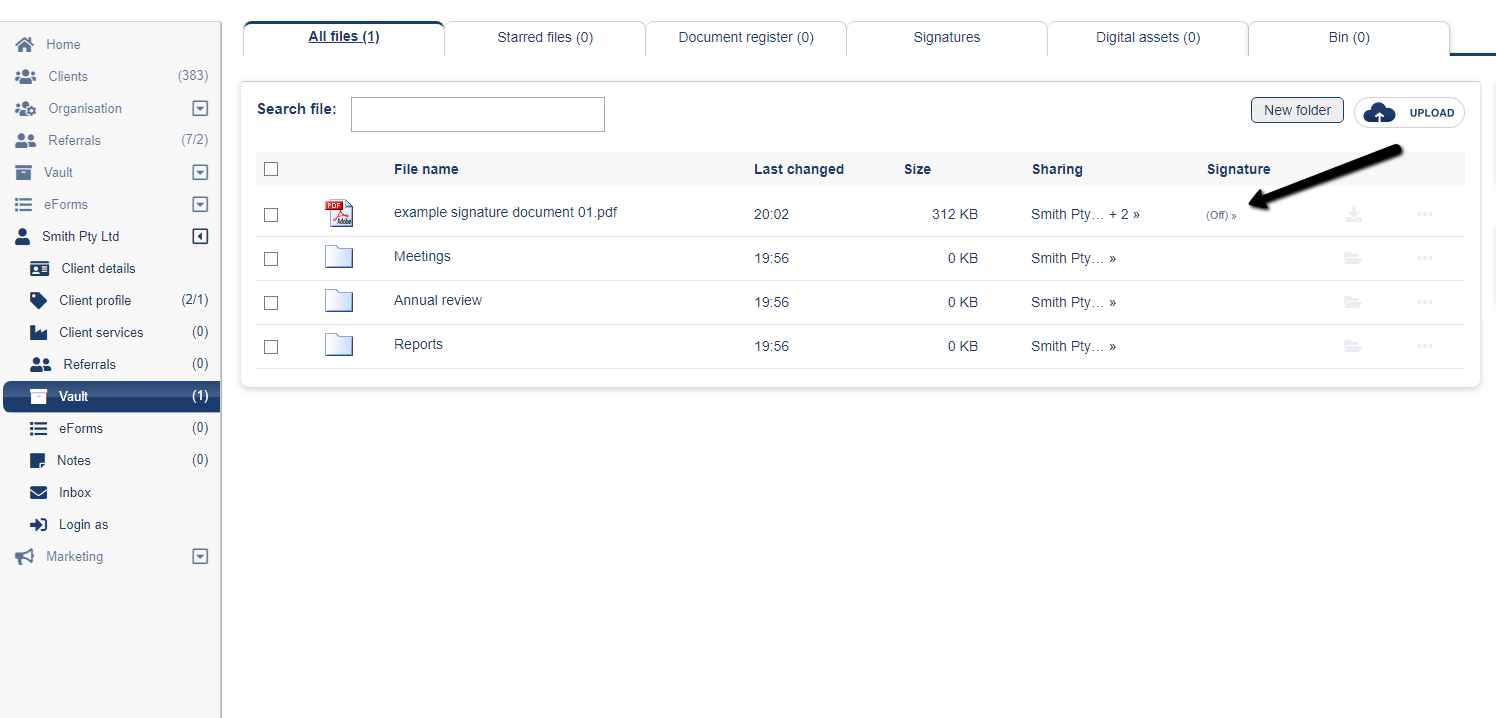
- Digital signature automatically added the company as a signature. Click the red "X" to remove the company.
- Click "Add recipients" and add Jane Smith, John Smith and yourself.
- Click "Next"
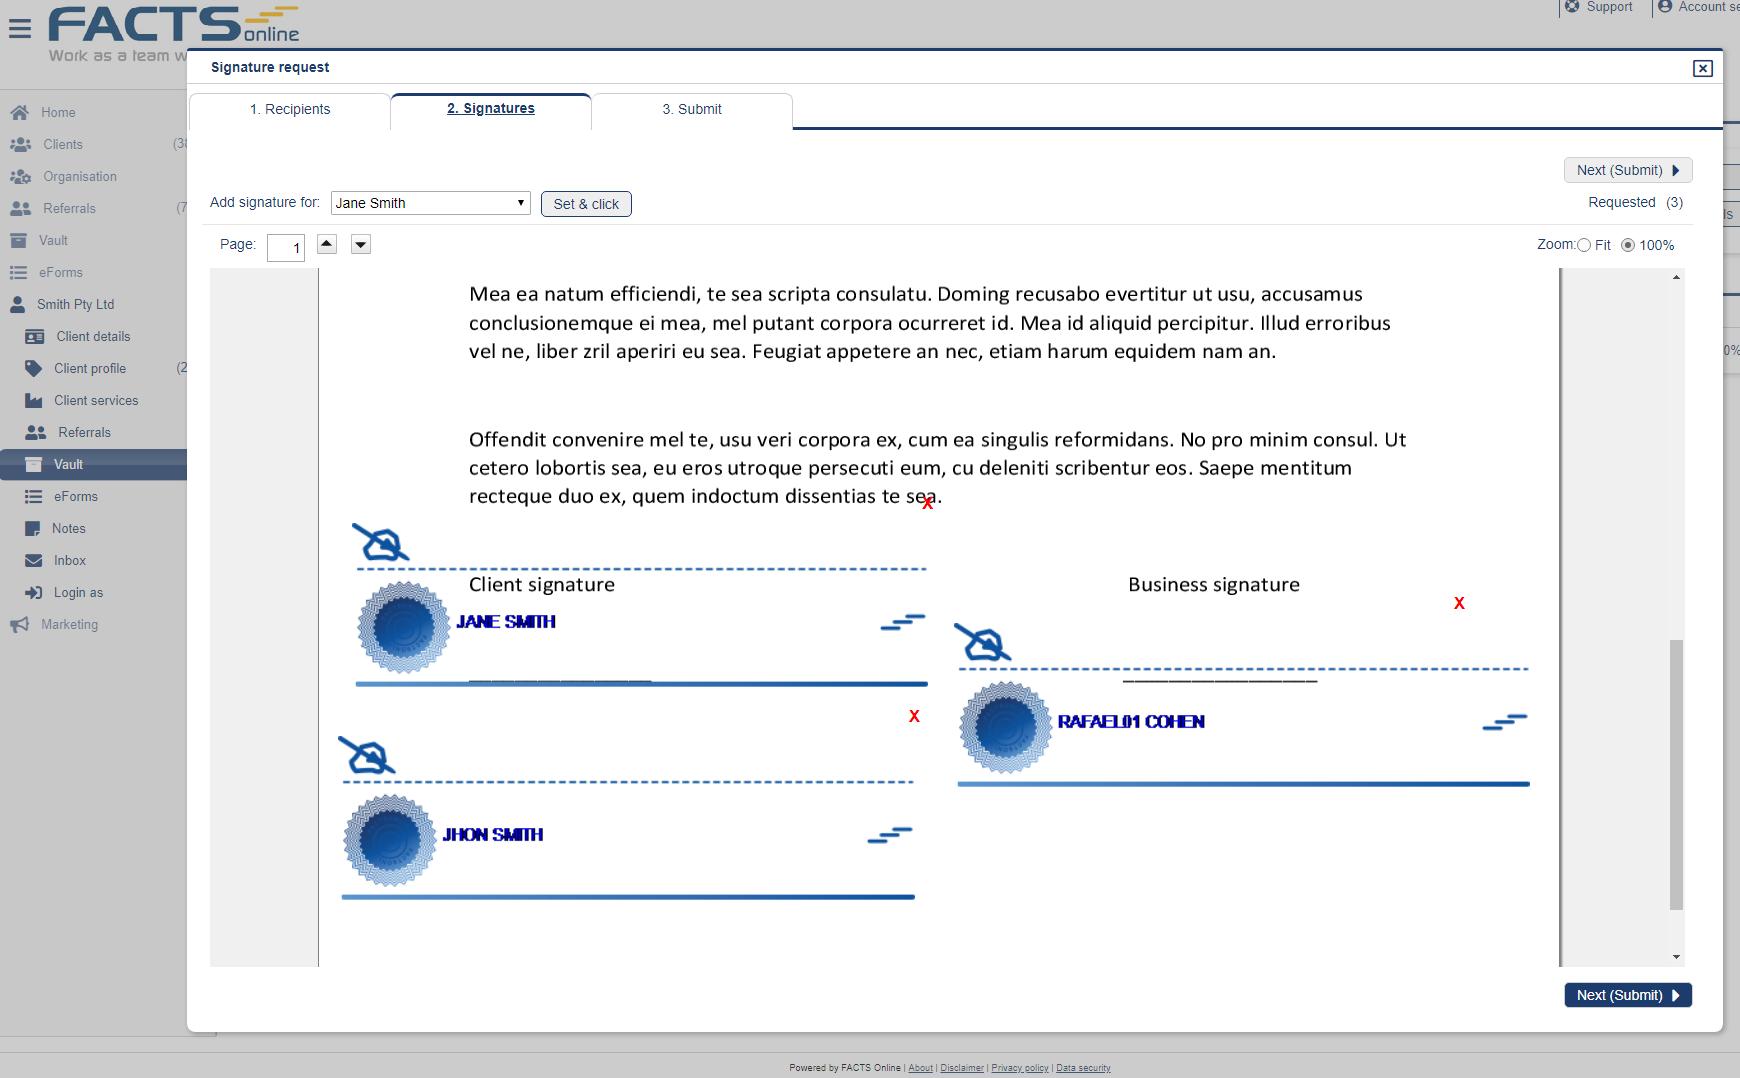
- At the Signature page, you are to locate the signature on the document. You can select each of the participants at the top, place the signature icon at the desired location and click to set
